Shower Repairs Australia
Shower Regrouting in Melbourne. When It Fixes a Leak and When It Doesn't
Regrouting stops some shower leaks for good. For others, it buys you a few months before the same problem returns. Here's how to tell which situation you're dealing with.
Most homeowners searching for shower regrouting in Melbourne have a leak. They’ve noticed water staining on the ceiling below the bathroom, or a damp patch spreading across the wall beside the shower, or grout that’s gone from white to black and soft around the edges. The question they’re asking is whether regrouting will fix it. This answer depends on where the water is going.
Regrouting fixes some shower leaks. It doesn’t fix others. Getting that diagnosis wrong costs you either a call-out fee for work you didn’t need, or weeks of believing the problem is solved while water sits behind your tiles and rots the framing underneath.
What Shower Regrouting Actually Does
Grout fills the gaps between tiles. In a shower, it also forms part of the waterproof barrier that keeps water on the surface and draining through the waste, rather than soaking into the substrate behind the tiles.
Standard cement-based grout is porous. Over time, water and soap scum work into it, mould colonises it, and the grout itself starts to shrink and crack. Once grout cracks or pulls away from the tile edge, water gets in. At that point, your shower is leaking behind the tiles every time someone uses it, even if you can’t see it yet.
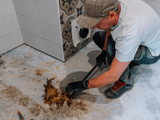
Regrouting removes the failed grout with an oscillating multi-tool or grout saw, cleans the joints, and fills them with fresh material. Most Melbourne tradespeople now use epoxy grout rather than cement because epoxy doesn’t absorb water. Cement grout needs resealing every six months to stay waterproof; quality epoxy lasts ten to twenty-five years without it.
That’s what regrouting does. It restores the grout joints. What it cannot do is fix anything that sits further back in the wall.
The Signs Your Grout Has Failed
Grout failure is visible. You don’t need a tradesperson to diagnose it.
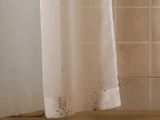
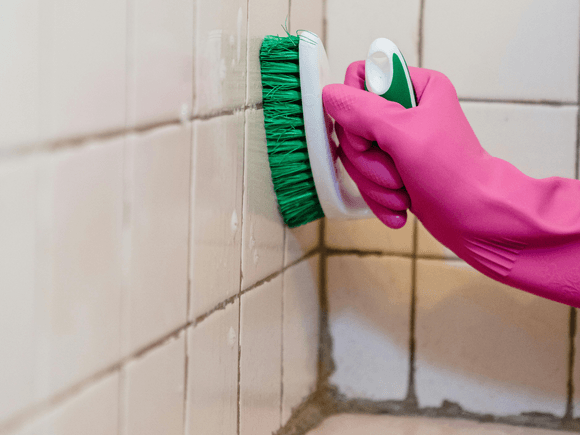
Look at the grout lines in your shower. If the grout has darkened to grey or black, that’s mould growing inside the grout. If the lines look thin or uneven compared to when the shower was new, the grout has shrunk. If you can press a fingernail into the grout and it gives, or if sections crumble when scratched, the material has broken down.
Check the silicone bead that runs along the bottom corners of the shower where the tiles meet the base. Silicone is flexible; grout is not. Builders put silicone there to allow for slight movement. If that silicone has pulled away from the tile, cracked, or turned black underneath, water is going in through the corner every time you shower.
A shower with failed grout and failed corner silicone leaks. Regrouting and resealing those corners will stop it.
A Melbourne shower built more than ten years ago and never regrouted is almost certainly leaking this way, whether you’ve noticed water damage yet or not. Shower grout and seals in Australia typically need replacing between five and eight years, and many older Melbourne homes have showers sitting well past that threshold.
When Regrouting Will Fix the Leak
Regrouting stops a leak when the waterproof membrane behind the tiles is intact and the leak is coming through the grout joints or silicone beads.
If your shower ticks these boxes, a regrout will fix it:
The leak is recent. You’ve noticed water damage in the past year or two. The shower isn’t old enough for the membrane to have deteriorated.
Water staining is directly beside the shower. Damp patches on the wall adjacent to the shower, or mould forming at the base of the bathroom wall beside the shower screen, usually trace back to silicone or grout failure at the edges.
The tiles are sound. No hollow sound when tapped, no tiles that shift under pressure, no cracking across tile faces.
The shower base isn’t cracked. If you have a tiled shower floor or a polymarble base, check the surface carefully. Intact base, grout problem. Cracked base, different problem entirely.
The damage is contained. A damp patch that hasn’t spread, no soft or spongy wall surfaces near the shower, no corrosion on the bottom of the shower screen frame.
In these situations, a professional regrout with epoxy grout and fresh silicone at the corners will seal the leak. Your shower will be ready to use again within twenty-four to forty-eight hours.
When Regrouting Won’t Fix the Leak
This is the part most regrouting companies won’t put on their website.
Regrouting replaces the grout. It cannot repair a damaged waterproof membrane. Every shower built to Australian standard (AS 3740) has a membrane applied to the substrate before tiling. That membrane sits behind the tiles, invisible. When it fails, water gets past the tiles and grout entirely and soaks into the wall or subfloor.
A regrout over a failed membrane does nothing useful. You’ll get a nice-looking shower for a few months, then the same damp patches, the same water damage, the same call-out.
Signs the membrane has failed
Water stains appearing on the ceiling of the room below the bathroom. Grout joints alone don’t push water that far; a membrane breach does.
Soft or spongy plasterboard on the wall adjacent to the shower. Press your hand against the wall. Solid plasterboard feels firm. Wet plasterboard gives under pressure and may have a slight flex to it.
Paint bubbling or lifting near the shower. This means water has been sitting behind that surface long enough to push through.
Corrosion or rust around the waste fitting where it sits in the shower floor. Water has been pooling under the floor.
Mould growing on the outside of the wall, not just inside the shower. External mould means moisture has worked all the way through.
If two or more of those signs are present, the membrane has failed. A regrout won’t solve it. If the waterproof membrane behind the tiles has failed, regrouting alone won’t fix it, you may need a more substantial repair to the wet area. At that point you’re looking at a shower reline or a partial rebuild, which is a different scope of work and cost entirely.
The other situation where regrouting falls short: a cracked shower base. A crack in a tiled shower floor or a polymarble base lets water through regardless of the grout condition. Regrouting the wall tiles while the base is cracked is incomplete. The base needs its own repair first.
The Dry Test
Before you call anyone, do this.
Dry the shower completely. Leave it unused for forty-eight hours. During that time, fill the shower waste with a plug or a plastic bag weighed down with water, then fill the shower floor with about fifty millimetres of water. Leave it for twenty-four hours, then check the water level.
If the water level drops, the floor has a crack or a failed seal around the waste. That’s a base or drain problem, not a grout problem.
If the water level stays constant, run the shower normally for ten minutes and watch where water appears on the adjacent walls or ceiling. Grout and silicone failures typically show up fast, within a few minutes of the shower running. Membrane failures take longer to track water to the surface, often showing up hours later.
This test won’t give you a definitive diagnosis, but it narrows the field before a tradesperson arrives.
DIY Regrouting: What You’ll Actually Encounter
Hardware stores sell grout removal tools and replacement grout for under $250. The process looks manageable on YouTube. In practice, the removal stage is where most DIY attempts go wrong.
Getting old grout out without chipping or cracking tile edges takes a steady hand and the right angle. Most bathroom tiles in Melbourne sit close together with narrow joints; an oscillating tool moving slightly off-angle clips the tile face. Once a tile chips or cracks, you need to replace it, and matching a tile from a renovation done ten or fifteen years ago is hard. Discontinued tiles are common.
Materials cost under $250, but if the regrout fails inside twelve months, you’re back to square one, and any leak damage in the meantime could cost more than a professional job would have.
DIY regrouting makes sense for a small section of grout in good structural condition, in a shower you’re not worried about long-term. For a full shower with an active leak, a professional job with a warranty is the better investment.
What a Professional Regrout Involves
A tradesperson doing this job properly follows a set sequence.
First, inspection. They check the tiles, the base, the silicone corners, and any adjacent walls. A good operator tells you at this stage whether regrouting is the right fix or whether something else is going on behind the tiles.
Grout removal comes next. All old grout comes out, down to the substrate. Leaving old grout in place and applying new grout on top doesn’t work; the bond fails quickly and the new grout cracks along the old lines.
The joints get cleaned, and the professional checks for any moisture sitting underneath. Trapped moisture needs to dry before new grout goes in.
New grout gets applied and pressed firmly into the joints. Epoxy grout requires mixing on site and cures harder than cement. Fresh silicone goes into the corner beads.
A curing period follows. Twenty-four hours minimum before the shower runs again, forty-eight hours to be safe.
A job done this way, with epoxy grout, should hold for eight to fifteen years before it shows the same wear.
Frequently Asked Questions
How much does shower regrouting cost in Melbourne?
In Melbourne, shower regrouting and resealing usually costs between $550 and $1,500. The price depends on the size of the shower, the grout type used, and whether any tiles need replacing beforehand. Epoxy grout sits at the higher end but lasts significantly longer than cement-based alternatives.
How long does shower regrouting last?
A professional regrout with epoxy grout lasts 8 to 15 years before showing the same wear. Cement grout jobs done on the cheap often fail within 3 to 5 years. Standard shower grout and seals in Australian homes should be replaced every 5 to 8 years as a baseline.
Will regrouting fix my leaking shower?
Regrouting fixes a leak when the waterproof membrane behind the tiles is still intact and the water is getting in through failed grout joints or silicone corners. If you're seeing ceiling stains below the bathroom, soft plasterboard beside the shower, or paint bubbling near the base, the membrane has likely failed and regrouting alone won't solve it.
Can I regrout a shower myself?
DIY regrouting materials cost under $250, but removing old grout without chipping the tiles is harder than it looks. Clipping a tile edge means sourcing a replacement, which is difficult if the tiles are more than a decade old. For a shower with an active leak, a professional job with a warranty is the lower-risk option.
How do I know if my shower needs regrouting or something more?
Dry the shower for 48 hours, plug the drain, fill the floor with 50mm of water, and check the level after 24 hours. A drop in water level points to a base or drain issue. If the level holds, run the shower and watch where damp patches appear on adjacent walls. Grout failures show up within minutes; membrane failures take longer to surface.
This article provides general information only and should not be considered professional advice. Building regulations and standards are subject to change. Always consult licensed building practitioners and relevant authorities for advice specific to your project. Information is current as of publication date and accuracy cannot be guaranteed.